Happy Holidays!!! First of all, I cannot believe we’re already into December… and that soon, we’ll be celebrating 2017… In 2017, I turn 30 and Brian and I will celebrate our TEN year anniversary. Like, I just can’t even!
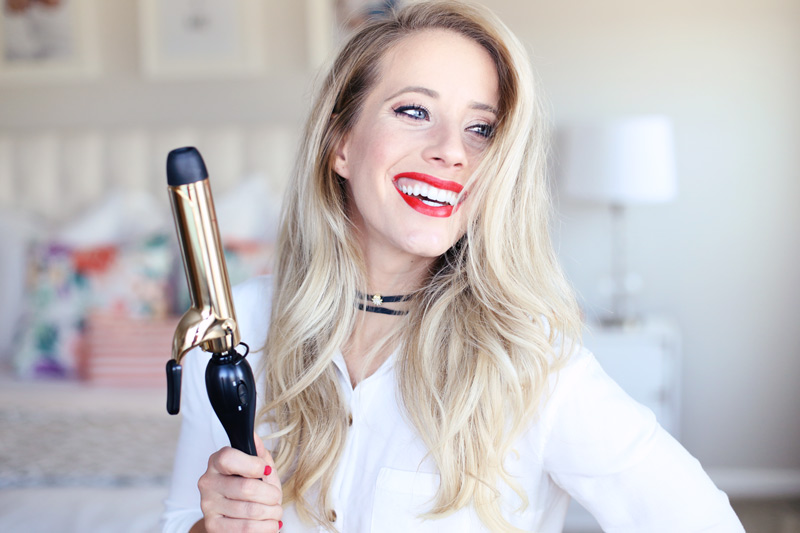
Before I work myself up any further, let’s take a step back and focus on finishing 2016, shall we?! I’m sure you guys have a few parties to go to this holiday season and so I wanted to share a couple easy tutorials with you! The first one is how to use a curling iron to achieve really pretty, loose waves! I gravitate towards the wand but when I want big loose curls, it’s the curling iron I reach for.
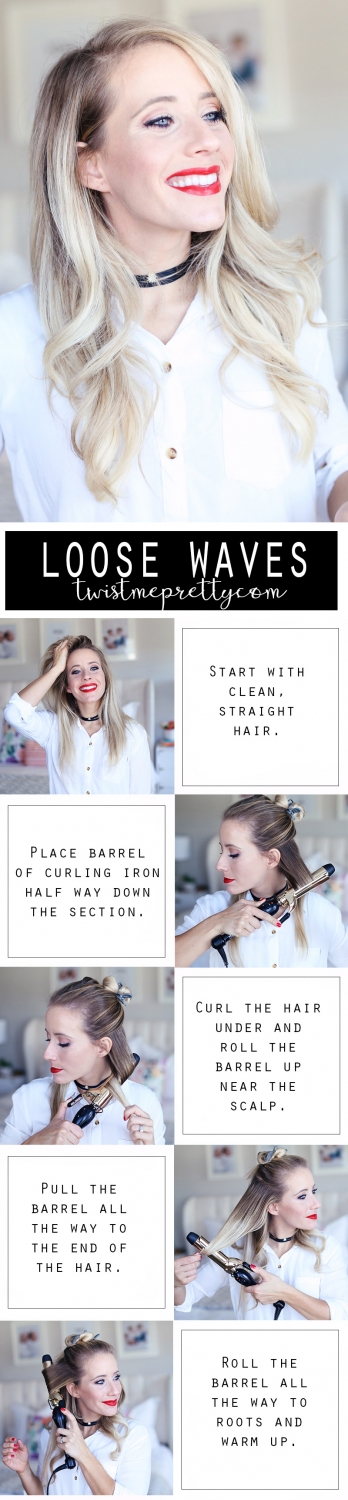
How To: Loose Waves
1. Start with clean, straight hair. I like to use an oil before applying any heat to protect the hair from any damage.
2. Section off the hair from the ears up and then take a small section — I like to divide the lower section into three sections to give you an idea — and place the curling iron halfway down the section.
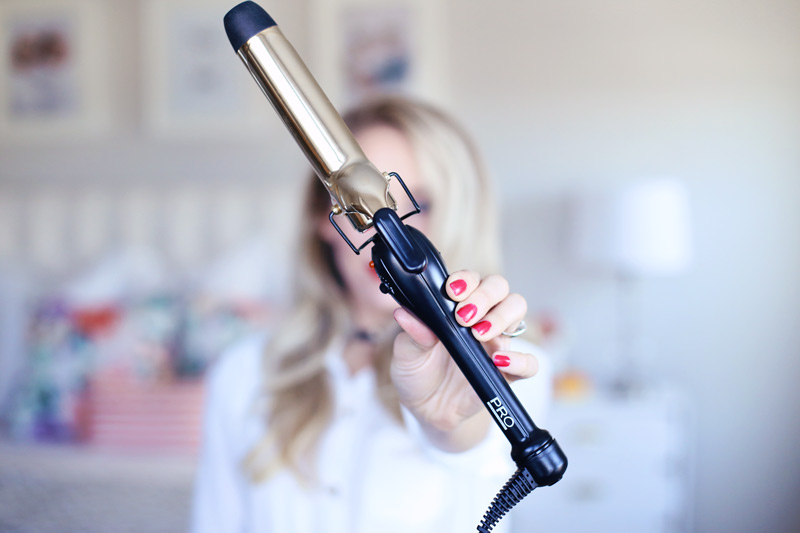
I’m using the Pro Beauty Tools® 1” Prof
I really like this one because the clamp isn’t too tight so it makes curling down to the end of the hair a breeze. It has multiple heat settings, it’s quick to heat up, has a swivel cord, safety stand, a high heat cool tip… annnnd shall I keep going? I think you get the drift!
3. Curl the hair under and roll the barrel up near the scalp. Let the hair heat up for a few sections and then…
4. Gently pull the barrel down, with pressure on the clip so you aren’t tugging your hair, all the way to the end of the hair. You can choose to curl the ends in the iron, or leave an inch or so out, depending on the look that you’re going for.
5. Roll the barrel all the way to the roots and warm up the hair, then release.
Continue pulling layers of hair down, and curling section by section. I prefer curling the hair away from my face, but if you’re going for a more vintage curl, you can curl the hair toward.
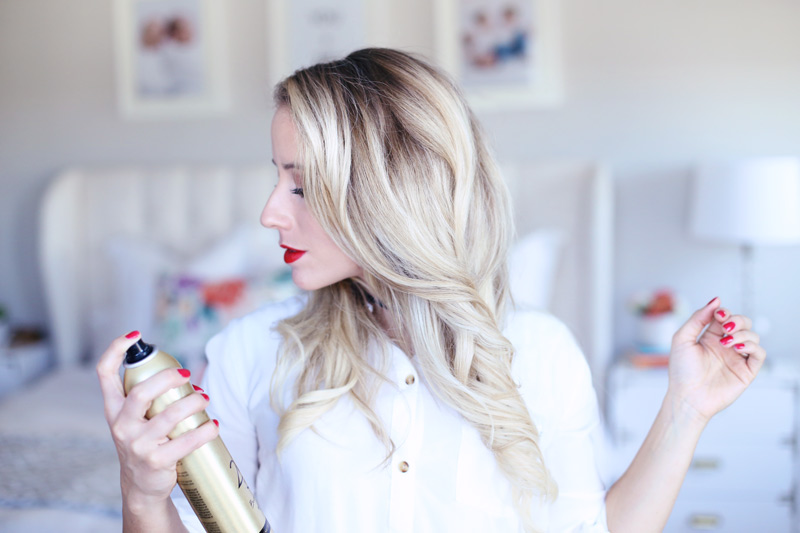
Once your hair is all curled, you can obviously leave it as is because IT’S GORGEOUS! Or you can spend a few more minutes and style this really pretty Holiday Updo. I love this Holiday Updo because it’s so easy but looks incredibly difficult.
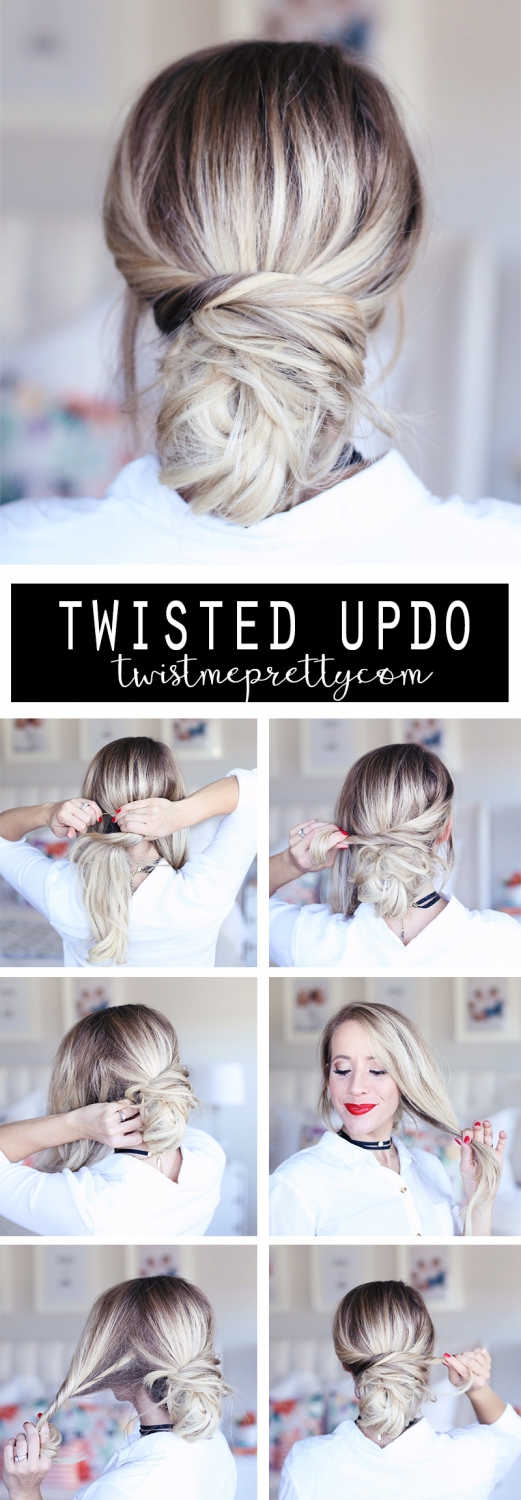
How to: Twisted Updo
1. Once your hair is curled, gather two small sections from behind the ears, pull two small sections from the front, and put the thicker middle section into a messy bun.
2. Take one of the small sections from the front and gently roll the sections back and drape it over the top of the messy bun.
3. Secure with bobby pins on the opposite side.
4. Take the second section.
5. Gently roll the section.
6. Drape the section over the messy bun and secure with bobby pins.
And there you have it! 2 Super cute and easy hairstyles that’ll be perfect for any party this holiday! The lipstick I’m wearing is Blu Red and can be purchased here (check out this post here for more info if you’re new!) and the rest can be shopped below.
XO!
Thank you Pro Beauty Tools for collaborating with me on this post!