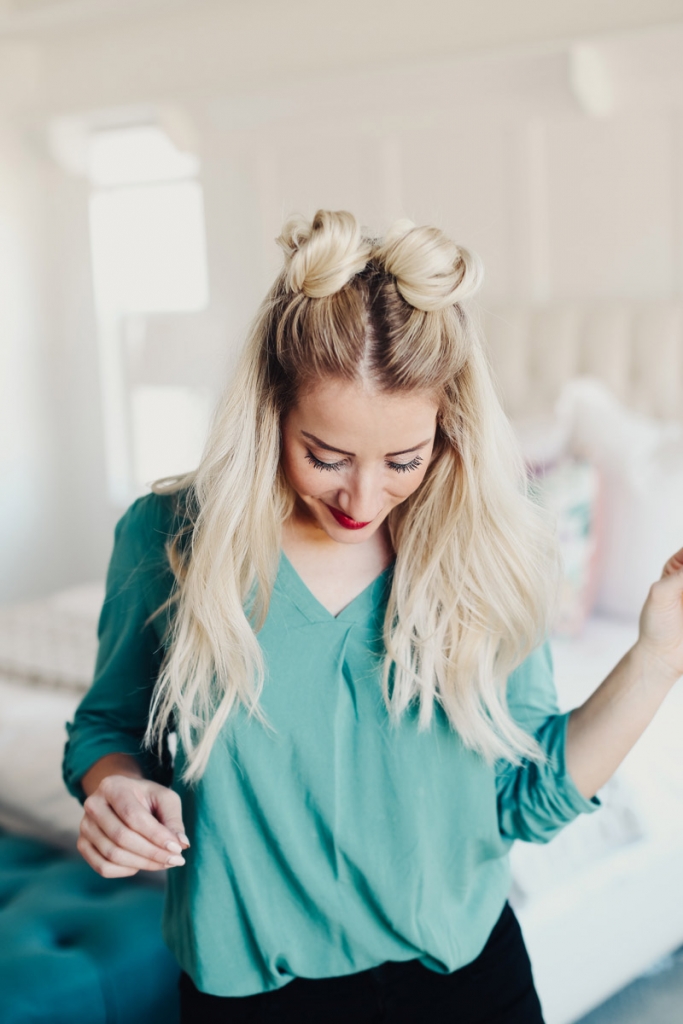
 Space buns!!! These buns have been e.v.e.r.y.w.h.e.r.e lately and I thought it was about time I share my spin on them. Or twist on them… ? haha!!! Of course I invited my little gal pal Sav to help me with this video and I hope you enjoy it! My technique is a lot different than most but I’ve found it’s the easiest way for me to get consistent looking buns. Messy buns work great but it’s hard for me to get symmetrical messy buns, which is important when the buns are on top of the head and right next to each other!!
The extensions I’ve been using lately are from JZ Styles. When I went platinum a month or so ago, none of my Laced Hair Extensions matched my new color and Lacy had just sold out of all the Platinum colors from their Black Friday sale. I needed some quick for my trip to New York and Jess was so sweet and sent me a set of her clip-ins! They’re beautiful! The JZ Styles hair is great quality hair, the clips are strong and stay put and the price is right! My hairstylist (@christinakreitel) toned them to match my blonde and then she gave them a root which I’ve LOVED!!!! They’re not half as noticeable as before which is really nice!!

AND A BIG HUGE THANK YOU!! We published our first vlog on Monday and I was super nervous about it! You just never know with the internet how things are going to be received! You guys have been so sweet and kind to my family, thank you so much! We are more excited than ever to keep up with the vlogs! We’ll be vlogging every Monday and Friday and you can watch our first vlog HERE. And then Savy’s first YouTube video was uploaded on Monday too and you can find it HERE!
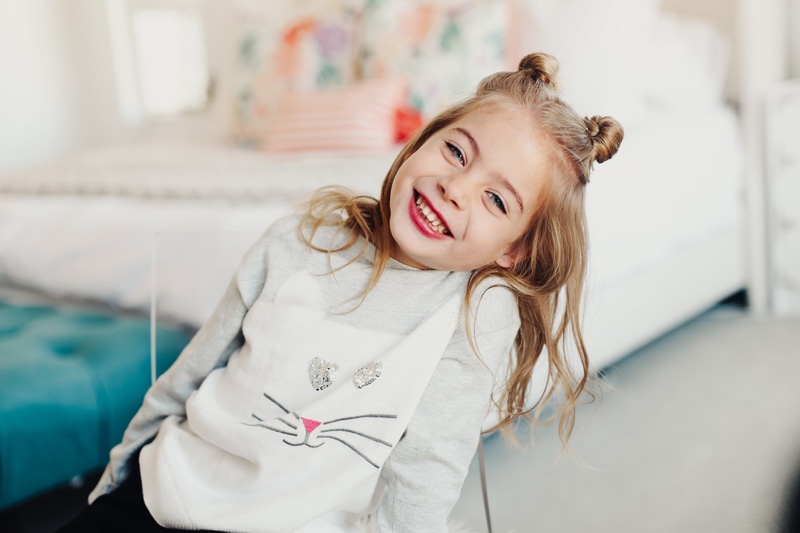
You can see more pictures of this hairstyle HERE

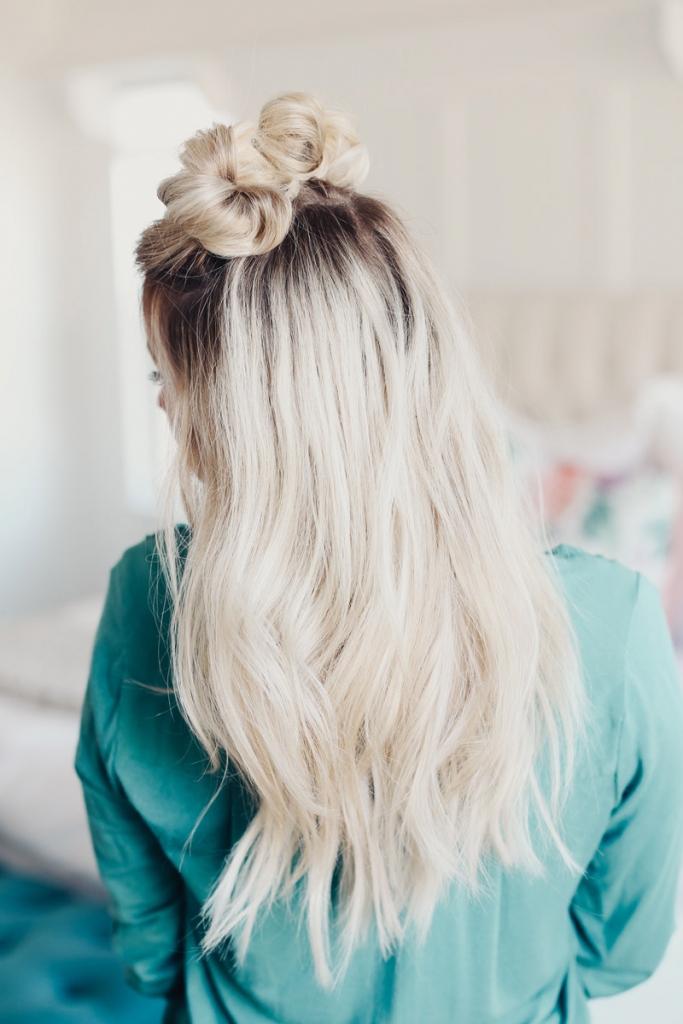
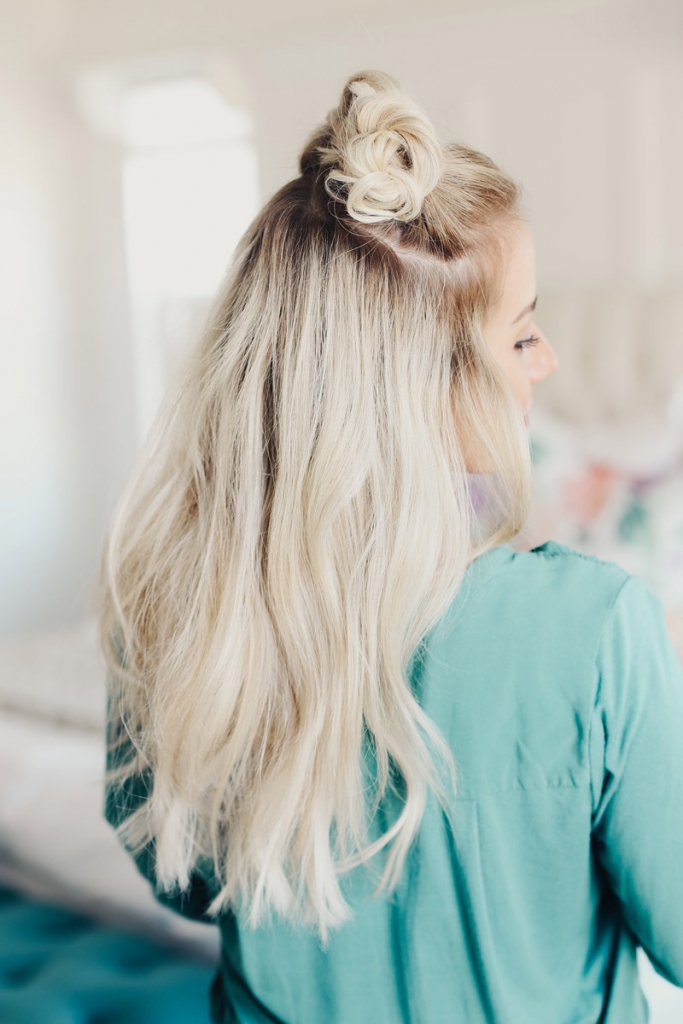
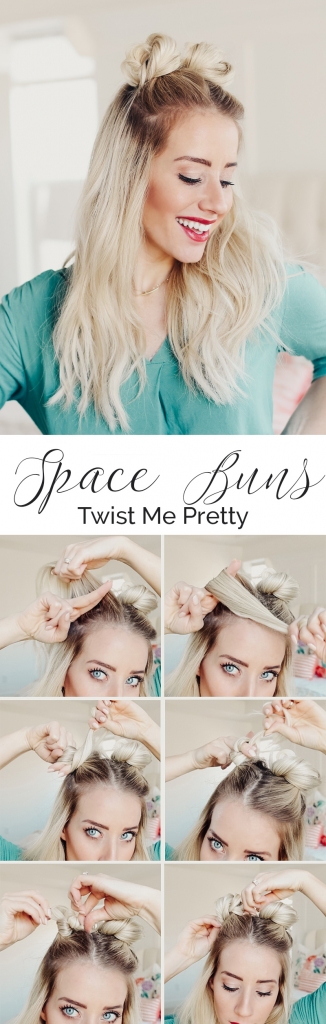
Back to the space buns. Here are the step by steps and then the video is down below!
- 1. Part your hair down the center
- 2. Spray fly-a-ways with hairspray
- 3. Clip in your single wefts if you need them
- 4. Gather a section of hair for the knot
- 5. Put two fingers in front of where you want the bun
- 6. Wrap the hair forward and around your index and middle fingers
- 7. Twist your wrist 360 degrees
- 8. With your middle finger and index finger, you are going to snag tha tail and pull the hair almost all the way through.
- 9. Take 2 bobby pins and secure the bun so that the bobby pins cross each other. (Before I secure it, I play with the knot for a second and make sure it has enough volume or that the detail is going in the right direction).
- 10. If there is a little bump or bubble, you can use another bobby pin to hold it down.
- 11. Repeat on the other side!
Text instructions can be a little bit tricky to follow, so here’s the video for you to watch. The end is hilarious btw, I have no idea where Savy comes up with these things!!! And then just in case, there’s a step-by-step pictorial for you too!!! If you want, you can share this hairstyle to one of your beauty boards!
Thanks babes! Love you all so much and can’t wait to see more of you!
xo